Spam
External spam whitelist
When you add an address to the external whitelist, all emails sent from this address will pass through the spam filters without being checked. This is used when a specific address is being rejected or being flagged as spam, but you know it is a legitimate email from a trusted sender.
Note
If the emails are getting treated as spam (moved to Junk folder) but do not get tagged with [*****SPAM*****] in the subject line, then you will need to adjust your Outlook or OWA junk mail filters.
To add an address, first login to the SchoolEmail Portal.
Login with your username and password. (Administrators only) Then using the navbar at the top, click Spam.

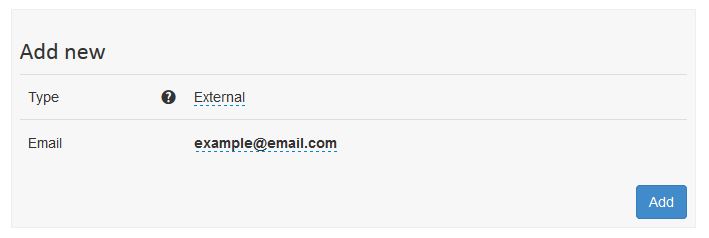
In the ‘Add new’ box, change the type to ‘External’ and click the tick to confirm the change.
Now in the ‘Email’ box, add the address of the user that needs to bypass the spam filter, and click the tick to confirm. Once you have added the information, click the add button.
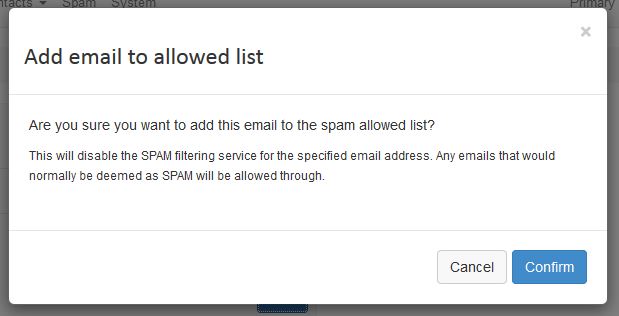
Now you will see a confirmation box appear. Click confirm and please allow up to 30 minutes for the changes to be applied.
Internal spam whitelist
When you add an address to the spam allowed list, all emails sent to the email address will not pass through our spam filters. This ensures that emails being delivered to a specific address are not being blocked/rejected by the SchoolEmail filters.
Warning
Doing this will completely bypass our spam and virus checks for the requested email address; this may result in a lot of spam and viruses being delivered to the inbox. If you allow an internal email address through our SPAM filters, you are accepting the risks involved.
To add an address, first login the SchoolEmail Portal. Login with your username and password. (Administrators only)
Then using the navbar at the top, click Spam.
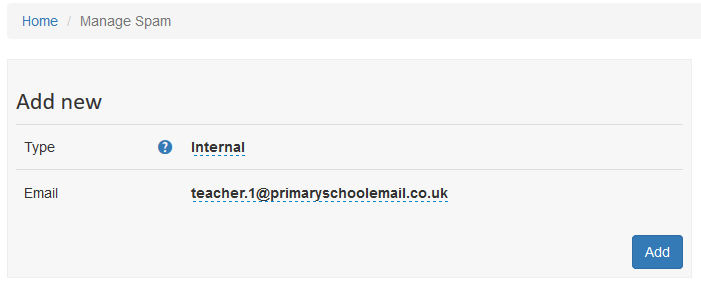
In the ‘Add new’ box, change the type to ‘Internal’ and click the tick to confirm change. Now in the ‘Email’ box, add the email address that you do not want to receive filtering for, and click the tick to confirm.
Once you have added the information as our example shows click the blue add button.
Now you will see a confirmation box appear. Click confirm and please allow up to 30 minutes for the changes to be applied.